7 Easy Foods to Preserve with Kids this Summer

Video: 7 Easy Foods To Preserve With Kids This Summer
Tools You May Need:
- canner
- mason jars
- mason jar lids and rings (make sure your lids and rings match the size of your jar-small or large mouth)
- magnetic lid lifter
- canning jar tongs
- quart size freezer bags
- saucer attachment for Kitchen Aid mixer
- canning funnel
Below are several foods to preserve with kids. I have listed the ways that kids can help with each of them, but the level of help depends on their age. The preservation methods I use below are canning and freezing. Kids can help with most of the work below with the exception of operating the canner. That part I have to finish on my own. Follow normal instructions for canning according to each food.
I have listed the fruits and vegetables in order as they come in season in our area.
#1 Strawberries

We like to make strawberry jam every year. Most years we have strawberries in our garden, but some years we buy them at a local market. The kids love to pick the strawberries everyday and see how many we get! There is just nothing like homemade strawberry jam! Also, it looks so pretty in the jars. Once we have made the jam, we put it in mason jars, but do not process in a canner. We leave a little room at the top of the jars for the jam to expand and put our jars in the freezer.
How we make strawberry jam: We use this sure jell recipe for low or no sugar jam. The recipes can be found inside the sure gel box as well. Here is the kind we buy.
The kids clean the berries and cut off the tops. Then they use a potato masher to mash it into a puree. I follow instructions on the sure jell box for adding jell and sugar and cook the jam over the stovetop. Finally, I pour the hot jam into jars. Once it cools, kids can help put on the lids and store them in the deep freezer.
Kids can:
- Pick berries
- Wash
- Cut tops off berries.
- Mash them with a potato masher to prepare for cooking.
- Add sugar and sure gel.
#2 Blueberries

We like to freeze our blueberries in quart freezer bags. These are great to eat semi-frozen as a winter snack or to put in yogurt or cereal.
This is a very simple process and kids can do most of it on their own. We have tried growing our own blueberries, but so far have been unsuccessful. For us, preserving blueberries means buying them at market seasonally or finding them on sale at discount grocery stores.
How we preserve our blueberries: Wash blueberries in a colander. Pick off any stems. Spread them out on a cookie sheet and put in freezer. (Freezing them on a tray keeps them from freezing in bunches in the bag.) Once blueberries are semi-frozen, pull them out of the freezer. Use a spatula to loosen them from the cookie sheet. Scoop into freezer bags and put in the freezer right away.

Kids can:
- Pick blueberries.
- Wash and pick off stems.
- Arrange on a cookie sheet and put in freezer.
- Pull out of freezer and use a spatula scrape semi-frozen blueberries loose from pan.
- Cup into freezer bags.
- Put bags in freezer.
#3 Pickled Cucumbers
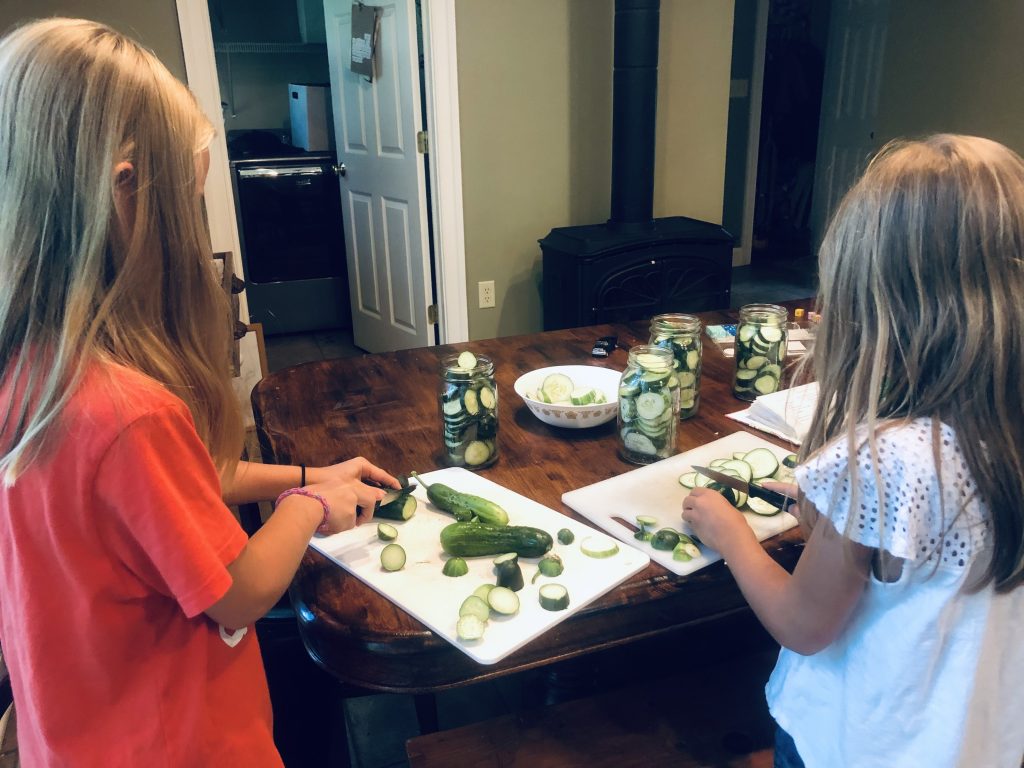

Who doesn’t love a juicy, sweet and sour pickle to go with that turkey and cheese sandwich? We love setting pickled cucumbers with our lunches. The kids go through a jar in one meal!
Ingredients needed:
- cucumbers
- dill seed
- garlic powder
- vinegar
- sugar
- salt
How we make pickled cucumbers: Wash and slice cucumbers. Put 1 tsp. dill seed and 1/8 tsp. of garlic powder in bottom of a quart mason jar. Fill with sliced cucumbers. Cover with 1/4 tsp. dill seed and 1/8 tsp. garlic powder on top. Make a brine separately in a pot: 2 cups water, 2 cups vinegar, 3 cups sugar, 2 TB salt. Mix brine on stovetop until hot and dissolved. Pour in jars over the cucumbers until near the top. Process in a canner for 5-10 minutes. They will be ready to eat 3 weeks after processed.
Kids can:
- Wash cucumbers
- Cut cucumbers (age appropriate)
- Put spices in the bottom and top of the jars
- Pour cooled brine into jars
#4 Green Beans

Green beans are one of the vegetables that we eat regularly with our dinner meals. If you have tasted the difference between store bought canned/frozen beans versus homegrown canned/frozen beans, then you know there is NO comparison! Home grown green beans are simply delicious! Additionally, store bought green beans are sprayed with more pesticides than most vegetables. According to Consumer Reports, green beans are the #1 green vegetable to buy organic.
Because green beans is a staple side veggie for us for dinner, we continually plant more and more of them in our garden. The important thing with beans is to pick them when they are still fairly small and before the seeds develop inside the pod. If they are too big, it completely changes the crispiness. You can also buy them in bulk in season at a local market. We freeze our green beans in quart bags.

How we preserve our green beans:
Cut or pick off the ends of the bean. Cut in half. Rinse in a colander. Scald beans in boiling water for 1 minute. Drain and let cool. Lastly, scoop in freezer bags and put in a deep freezer.
Kids can:
- Cut or pick off the ends of the bean. Cut in half.
- Wash beans.
- Scoop cooled beans into freezer bags.
#5 Diced Tomatoes

I canned diced tomatoes for the first time last year. The first batch I did on my own without the kids’ help. It really was so much work that I wasn’t sure if it was worth it when you can buy a can of diced tomatoes for less than $2 at a grocery store. When I made the second batch, however, I had the kids help. It was much more efficient and taught them a valuable skill. Additionally, I found that I LOVED having these jars of diced tomatoes all winter. I dislike the stringy BPA lining that I can feel and see when I open the jars. Though it was a little bit of work, I definitely prefer them to store bought cans.
*Important note: One mason jar quart of diced tomatoes is the equivalent of about two 15 oz. jars, so it is nice for feeding a large family or doubling a recipe.
How we can diced tomatoes: Wash tomatoes. Cut off tops. Scald in boiling water for 30-60 seconds. This helps the skins to pull off easily. I put a bunch of tomatoes in a mesh bag and dip them in the boiling water. When you pull the tomatoes out of the boiling water, put them in a bowl of cold water. Peel off the skins. Cut the tomatoes and put in jars. Fill jars to the top. You may have to keep mashing them down. Add salt and a little lemon juice or citric acid. The citric acid in the lemon juice helps the tomatoes keep their red color and lowers the ph level which aids in safer processing. Finally, follow canning instructions for tomatoes. Grandma’s Canned Tomatoes is the recipe I use.
Kids can:
- Wash tomatoes
- Cut off tops
- Pull off skins
- Dice (age appropriate)
- Fill jars
- Sprinkle salt and citric acid on the top.
#6 Creamed Corn

This kind of creamed corn is something you CAN NOT find in any grocery store! Creamed corn from summer corn is a family favorite! In the past we have bought our corn from a market or a local farm stand. Last year, however, we attempted to grow it in our garden for the first time. We had a decent yield, but not enough for what our family needs. This year we are planting twice as much and hoping to use all our own corn for freezing. I’ll let you know how it goes!
**Note: You will need a corn creamer for this recipe.

How we make Creamed Corn:
Husk the corn. This is a great family bonding activity! Wash and pick off the silk. Boil corn in large kettles for 10 minutes. Use tongs to take out of the kettle. Put the corn in a tub of very cold water. (If you skip this step, it takes a LONG time to cool.) Lay on a towel to cool. Put the corn creamer over a large bowl to catch the dripping corn. Slide the corn across the creamer, turning the cob with each stroke until the cob has no more corn on it. The creamed corn will drip into the bowl. Scoop the corn into quart sized bags and freeze.
Kids can:
- Husk corn
- Wash
- Clean off the silk
- Cream the corn
- Scoop into bags
#7 Applesauce

When my husband and I first got married, his mom helped us can our first batch of applesauce. Consequently, every year since then, she and the rest of the family join together to help make enough applesauce to feed our crew! We love having shelves filled with jars of applesauce to enjoy all winter.

How we make applesauce: Wash apples. We use Rambo apples, but you can use any type of apple. Cut in quarters and cut out the core. Fill a stock pot and add 4-6 cups of water. You have to experiment a little with how much water to add. Too much water will be runny, too little will be too thick. Heat to a boil with lid on (to prevent splashing) and stir regularly. When apples are soft and soupy, they are ready to be run through a saucer. You can use a Kitchen-Aid saucer attachment. The saucer will strain out the skins and any remaining core. Last but not least, after the sauce has been strained, we pour the sauce into jars, ready to be processed in a canner.
Kids can:
- Wash apples
- Cut and quarter (as appropriate by age)
- Pour cooked applesauce through strained, with assistance
- Pour strained applesauce into mason jars
Important Last Step
Don’t forget the last and most important step! Show them the rows of jars or stacks of frozen food that they have helped to preserve. Let them take pride in the beautiful display of their hard work!
You can read a more detailed description of our applesauce making process in How To Can Applesauce and Pass Down a Family Tradition.


Would you like to try one of these 7 easy foods to preserve with kids this summer? Give it a go and let me know how it turns out!
You may also enjoy reading these posts about life skills.
50 Life Skills That Should Be Taught At Home
Useful Life Skills Suitable To Teach in Winter
Useful Life Skills Suitable To Teach in Spring
Important Life Skills To Teach Kids in Summer
Valuable Life Skills For Kids To Learn in Fall
PIn it! 7 Easy Foods For Kids to Preserve This Summer


I LOVE this article! Thanks for giving me great ideas and ways to incorporate my inquisitive 5 year old in the kitchen!
Thank you! I’m glad you enjoyed it! It’s a little more work with kids in the kitchen when they are little, but I think it’s worth it!
Brilliant, I love how the kids are involved and that they get to acknowledge all their hard work. This is a beautiful post
Thank you so much!
I love this. This is amazing information. I want to do this very thing with my kids.
Thank you! Good luck!
So much fun! I love all these ideas and how it encourages more time spent with my favorite little people! Can’t wait to try some this summer.
It is fun! It can be a lot of work in the moment, but everyone feels proud seeing the finished product!
This is very inspiring. I’m just about to head into preserving season with a bit of anxiety. I needed this to organize my plans and remind me of how great the results are after the work 🙂
Thank you! I’m glad it inspired you. I hope it goes well this summer!
I have never tried freezing green beans! What a great idea and sounds so much easier than canning.
I agree! I was turned off to trying green beans for years because I heard you had to use a pressure canner, rather than a regular canner. It just seemed like too much work to me. Freezing them is so fast and we all really like the taste and texture!
Hi!
I love your content! I found you today on YouTube and am so grateful for it! It’s been hard lately!
I’m a Charlotte Mason homeschooling mom of 5, I’m trying to stop worrying about not failing the kids and caring too much about academic work, but it’s hard to let go of years of public school conditioning!
About pickles: does this recipe work for small cucumbers as well? Also, what type of vinegar do you recommend?
Thank you again!
I wish you and your beautiful family a great rest of summer!
All the best,
Lara
Thank you! So glad you found me through YouTube and glad my content has encouraged you! I completely relate to having to let go to years of conditioning. It was a similar experience for me (and I think for a lot of homeschool moms!) I hope you have a good year with your kids. Don’t be too hard on yourself. You are probably getting so much more done than you think you are.
Yes, actually small cucumbers are the best for this recipe. The smaller the better. I use apple cider vinegar. For other recipes I spend a little extra $$ to buy raw apple cider vinegar, but for this the vinegar gets boiled in the canner so it would kill the live probiotics. Regular apple cider vinegar is fine.